
Adding Tenants and Verifying Separation
This article is a continuation of Creating a Laravel SaaS Framework .
Picking up from the last article, we now have a single tenant on our system with the subdomain of “foo”. Let’s work on a few additions to the app, including:
- A second tenant!
- Abort if a tenant doesn’t exist
Adding a Second Tenant
Let’s add a second tenant and verify that they have some separation. For this one, we’ll use a subdomain of “bar”. Make sure to save the password somewhere.
$ php artisan tenant:create bar "Tabitha Bojangles" #ob#gnovgun#at#rknzcyr.pbz#ob#
Tenant 'Tabitha Bojangles' created for bar.localhost
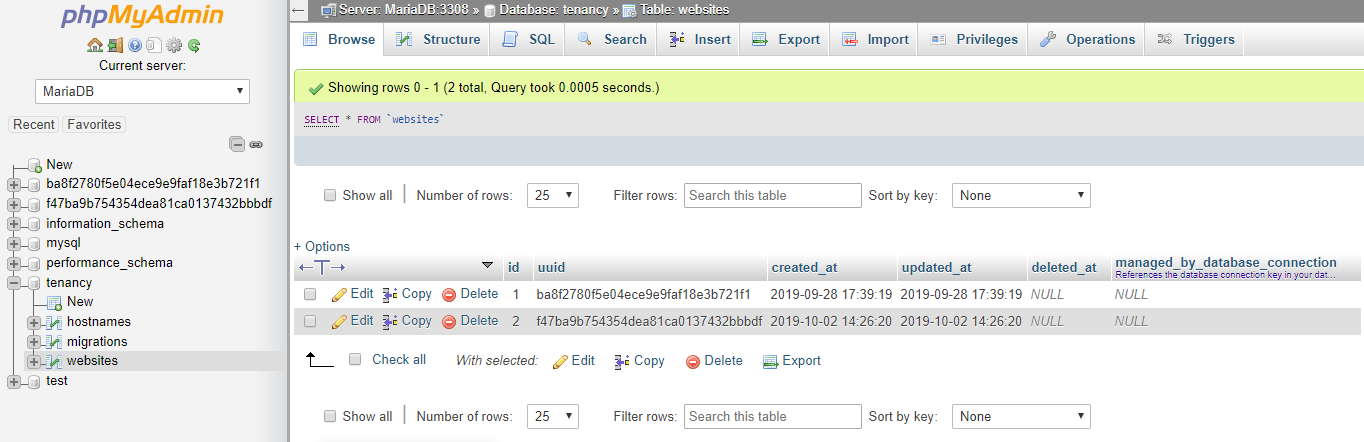
The user '#ob#gnovgun#at#rknzcyr.pbz#ob#' can log in with password evfyZmdan0HyVcseNow let’s check our database to make sure that everything went according to plan. We now see a second hostname set up in the tenancy database as well as a website and a new database matching the UUID.

Verifying Tenant Separation
At this point it’s important to verify that we can sign in to both tenant sites and that one tenant does not have access to the other tenant. Since we already added our hostnames to Windows hosts, we should be able to navigate to both foo.localhost:8000 and bar.localhost:8000 (make sure you’re still running the server with the artisan serve command).
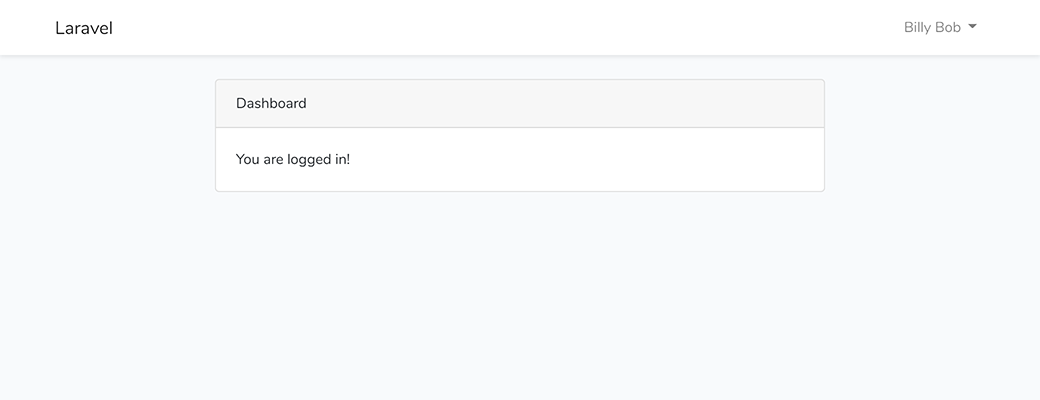
Navigate to foo.localhost:8000 first. It should display the default Laravel page with login and register at the top. Click LOGIN and enter Billy Bob’s email and password (created in Part 2). You should successfully show the logged in /home page.
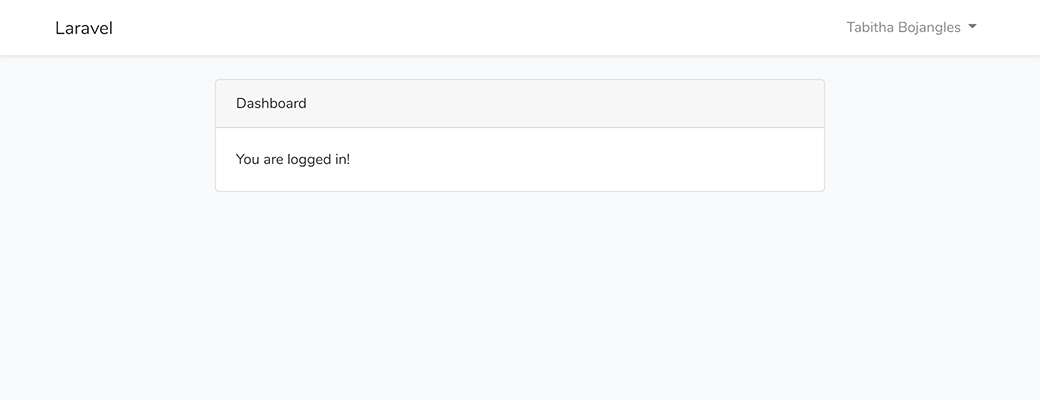
Now open up a new browser tab and navigate to bar.localhost:8000. If everything went well, you should NOT be logged in here. Also, if you navigate to bar.localhost:8000/home it should automatically direct you to the correct bar.localhost:8000/login page. Let’s log in to the “bar” tenant just to see if that’s working. Using the credentials you hopefully saved earlier in this walk-through, log in as Tabitha.
So now you should be logged in as both users. Navigating back and forth between foo.localhost:8000 and bar.localhost:8000 will should show their respective pages.
Abort if a Tenant Doesn’t Exist
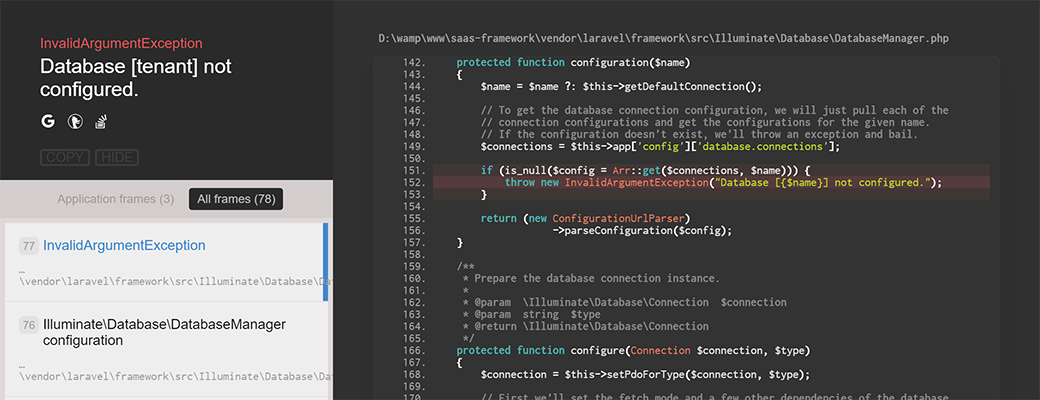
What happens now if we navigate to something that doesn’t exist? For example, unicorns.localhost:8000. Well, at this point you should still see the default Laravel page, with Login and Register links a the top. That’s not ideal, because if you click on that Login link and enter any credentials you’ll get that “Database [tenant] not configured” error.
To deal with this problem, there are a couple of options.
Option 1: Use the Hyn Tenancy options
The Hyn Tenancy package comes with an option to abort if the hostname isn’t found. There’s an option for TENANCY_AUTO_HOSTNAME_IDENTIFICATION and TENANCY_ABORT_WITHOUT_HOSTNAME that work together with the HostnameActions middleware to display a 404 if the hostname can’t be identified.
Simply add the following to your .env file to enable this. The auto identification option is already defaulted to true, so we don’t need to worry about that.
.env
TENANCY_ABORT_WITHOUT_HOSTNAME=true
Refresh your cache in the console for this to take effect.
$ php artisan config:cache

Configuration cache cleared!
Configuration cached successfully!
Now if we navigate to unicorns.localhost:8000 we get a 404 page.

That’s pretty good, but if we navigate to localhost:8000 with NO subdomain, we’re also going to get that 404. That’s not ideal since we’re going to want to add on some sign up forms and such so that people can use (and pay for) our application.
Option 2: Roll Our Own Middleware
If you tried option 1, make sure you remove that TENANCY_ABORT_WITHOUT_HOSTNAME=true line from your .env and clear your cache again.
Instead of using the built-in middleware, let’s create our own so that we have more control over where the 404 page shows up. Start by creating the middleware with an artisan command.
$ php artisan make:middleware TenantExists

Middleware created successfully.
Open up the newly created TenantExists middleware file and modify it like follows:
app\Http\Middleware\TenantExists.php
<?php

namespace App\Http\Middleware;

use Hyn\Tenancy\Models\Hostname;
use Closure;

class TenantExists
{
    /**
     * Handle an incoming request.
     *
     * @param  \Illuminate\Http\Request  $request
     * @param  \Closure  $next
     * @return mixed
     */
    public function handle($request, Closure $next)
    {
        if ( $request->user() == null ) {
            $fqdn = $request->getHost();
            if ( ! $this->tenantExists( $fqdn ) ) {
                abort(403,'Nope.');
            }
        }

        return $next($request);
    }

    private function tenantExists( $fqdn ) {
        return Hostname::where( 'fqdn', $fqdn )->exists();
    }
}
Here we’re not actually returning a 404. Instead we’re returning a 403 with a message of “Nope.”
Now let’s add our new middleware to the Kernel so that we can use it in our routes. Find the $routeMiddleware array and add in our new class.
app\Http\Kernel.php /**
* The application's route middleware.
*
* These middleware may be assigned to groups or used individually.
*
* @var array
*/
protected $routeMiddleware = [
'auth' => \App\Http\Middleware\Authenticate::class,
'auth.basic' => \Illuminate\Auth\Middleware\AuthenticateWithBasicAuth::class,
'bindings' => \Illuminate\Routing\Middleware\SubstituteBindings::class,
'cache.headers' => \Illuminate\Http\Middleware\SetCacheHeaders::class,
'can' => \Illuminate\Auth\Middleware\Authorize::class,
'guest' => \App\Http\Middleware\RedirectIfAuthenticated::class,
'signed' => \Illuminate\Routing\Middleware\ValidateSignature::class,
'throttle' => \Illuminate\Routing\Middleware\ThrottleRequests::class,
'verified' => \Illuminate\Auth\Middleware\EnsureEmailIsVerified::class,
'tenancy.enforce' => \App\Http\Middleware\EnforceTenancy::class,
'tenant.exists' => \App\Http\Middleware\TenantExists::class,
];We’re all set to start using this in our routes, but we’ll need to break out or Auth routes in order to add them to a new middleware group. Open up web.php and replace Auth::routes() with all of the individual authentication routes, wrapped in our middleware. This is outside our domain route for localhost, which will handle the root domain.
routes\web.php
...

// Ensure that the tenant exists with the tenant.exists middleware
Route::middleware('tenant.exists')->group(function () {
    // Not Logged In
    Route::get('/', function () {
        return view('welcome');
    });

    // Login Routes
    Route::get('login', 'Auth\LoginController@showLoginForm')->name('login');
    Route::post('login', 'Auth\LoginController@login');
    Route::post('logout', 'Auth\LoginController@logout')->name('logout');

    // Password Reset Routes
    Route::get('password/reset', 'Auth\ForgotPasswordController@showLinkRequestForm')->name('password.request');
    Route::post('password/email', 'Auth\ForgotPasswordController@sendResetLinkEmail')->name('password.email');
    Route::get('password/reset/{token}', 'Auth\ResetPasswordController@showResetForm')->name('password.reset');
    Route::post('password/reset', 'Auth\ResetPasswordController@reset')->name('password.update');

    // Email Verification Routes
    Route::get('email/verify', 'Auth\VerificationController@show')->name('verification.notice');
    Route::get('email/verify/{id}', 'Auth\VerificationController@verify')->name('verification.verify');
    Route::get('email/resend', 'Auth\VerificationController@resend')->name('verification.resend');

    // Register Routes
    Route::get('register', 'Auth\RegisterController@showRegistrationForm')->name('register');
    Route::post('register', 'Auth\RegisterController@register');
});

// Logged in
Route::get('/home', 'HomeController@index')->name('home');
Now any top level urls or login routes will first to through the new middleware. Let’s navigate to localhost:8000 to make sure we’re seeing the page like we should.

Perfect! Now let’s navigate to unicorns.localhost:8000 to see what we get.

Just what we were looking for.
Wrapping Up
We now have two separate tenants and the ability to separate out a landing page on the top level domain for new users to register. In the next article I’ll cover the registration process and how it will set up the tenants. Depending on how long that piece gets, I may get to installing Laravel Cashier as well so that we can see how that will tie in.
Additional Resources:
