
This article is a continuation of Creating a Laravel SaaS Framework .
Setting up Stripe Webhooks and Laravel Cashier
It’s been a little while since I’ve been able to update this series due to a large amount of web development work at the moment, but let’s continue with a look at Stripe’s webhooks and how they integrate with Laravel Cashier.
Now, I know it says “everything’s cool” on the Laravel Cashier page, but what is Cashier really doing behind the scenes, and is it enough?
Installing Stripe CLI
Start by setting up Stripe’s Webhook CLI. You can grab this at https://stripe.com/docs/stripe-cli. Depending on your environment, chose brew, yum, etc. I’ll be using their Windows executable since I work primarily on Windows 10. The latest version of this can be found at https://github.com/stripe/stripe-cli/releases. Unzip the exe and put it somewhere useful, like D:\stripe-cli\. Now open up a command prompt, navigate to the correct folder and type:
$ stripe loginNote: there might be a warning from your firewall and/or antivirus. Maaaybe don’t worry about that? Stripe as a company is trusted, so you should be fine here.
Pressing Enter opens up a browser where you can log in to your Stripe account. Once you log in, verify that your pairing code is the same shown in your CLI. Accept access and you’ll see it update in your CLI as well as in your browser. Great job! You can close the browser and start testing with stripe CLI.
At this point, it’s just hanging out there on it’s own, so you’ll need to tell it where your application is. If you’re not already running your app, open up another command prompt, bash or whatever and run “php artisan serve“. That’ll start up your local development on 127.0.0.1:8000 by default, so you’ll need to forward any webhooks there. The default route would be 127.0.0.1:8000/stripe/webhook (you can also use localhost).
Type the following in the command window you’re using for Stripe to forward over to your application.
$ stripe listen --forward-to localhost:8000/stripe/webhookNow that Stripe CLI is sending information over to your Laravel app, you’ll need to remove the CSRF protection from your stripe webhook URI. Open up the VerifyCsrfToken middleware, find the $except array and add the following:
app\Http\Middleware\VerifyCsrfToken.php
    protected $except = [
        'stripe/*',
    ];
After that, update your .env with the webhook signing secret provided by the Stripe CLI. This allows Cashier to verify that the information coming in is legitimate. Open up your environment file and add in the code that’s displayed in your CLI after running the listen command.
.env
STRIPE_WEBHOOK_SECRET=whsec_YOURCODEHERE
Note: when you’re ready for your production environment, this code can be found in your Stripe Dashboard.
Refresh your config cache (in your Laravel installation cmd).
$ php artisan config:cacheCashier’s Build-in Webhooks
So what exactly are the webhooks in Cashier doing? What’s available out of the box?
Built in webhooks are: (click the bullet for Stripe’s documentation of each)
- customer.subscription.updated
- Deletes the subscription if Stripe sends a status of ‘incomplete_expired‘ for cleanup
- Updates subscription quantity
- Updates plan ID
- Updates trial end date
- Updates cancellation date
- Updates the status
- customer.subscription.deleted
- Marks a subscription as cancelled and updates the ends_at column to the current time
- customer.updated
- Updates the default payment method for a subscription
- customer.deleted
- Cancels all of the customer’s subscriptions
- Nulls out the stripe_id, trial_ends_at, card_brand and card_last_four columns for the customer
- invoice.payment_action_required
- If the ‘payment_notification’ option is set in Cashier, this sends an extra notification to the customer that verification of the payment is required
Testing Webhooks
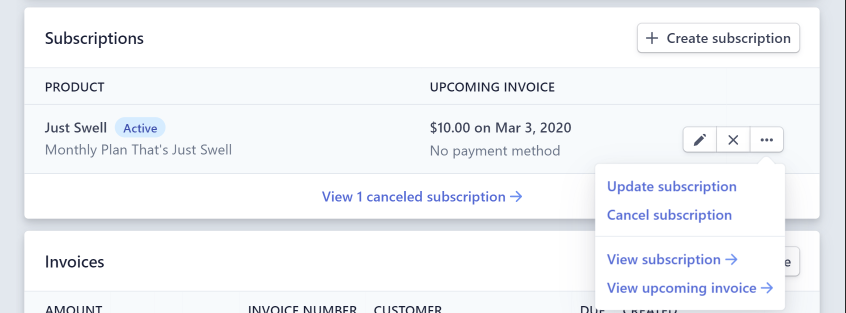
Let’s test the subscription deleted webhook and see what’s going on. Because the payload is a Stripe account object and Cashier is looking for specific keys within that object ($payload[‘data’][‘object’][‘customer’] for example), you’ll need to log in to your Stripe Dashboard, swap over to view test data and find a test data customer to work with. Once you’ve located the correct customer, open up your local database as well and find that record in the tenancy→subscriptions table.

Now back over in the Stripe dashboard, cancel the subscription.
You should immediately see that the Stripe CLI updates with the webhook. First it receives the data from Stripe, then it forwards it to the webhook route we set up earlier.
2020-02-03 16:55:40   --> customer.subscription.deleted [evt_1GeeNEZw1qerfsdfsLWGjJ3i]
2020-02-03 16:55:42  <--  [200] POST http://localhost:8000/stripe/webhook [evt_1GeeNEZw1qerfsdfsLWGjJ3i]
Cashier does it’s thing here, and sets the customer’s subscription to canceled, which we can verify in the database.

Re-Enabling the Subscription
So what happens now if we re-enable the subscription in Stripe? Let’s add back the subscription in the Stripe Dashboard. You should immediately see a whole bunch of actions show up in the CLI.
2020-02-03 17:14:30   --> charge.succeeded [evt_1G8DafsdFvuvQHLJUwZ]
2020-02-03 17:14:30   --> payment_intent.succeeded [evt_1adfsddHFvuBsacsfGc]
2020-02-03 17:14:30   --> invoice.created [evt_1G8DBaEZw1C4HasdfadsfOXJbjQ]
2020-02-03 17:14:30   --> invoice.finalized [evt_1G8DBaEZw1adfasdfxOJCdrg3]
2020-02-03 17:14:30   --> customer.subscription.created [evt_1G8adfsdfsaRSxyyo]
2020-02-03 17:14:30  <--  [200] POST http://localhost:8000/stripe/webhook [evt_1G8afdsadsdasdJUwZ]
2020-02-03 17:14:30   --> payment_intent.created [evt_1G8DafdsadfasdVVJK]
2020-02-03 17:14:31  <--  [200] POST http://localhost:8000/stripe/webhook [evt_1GasdfsdfdsadfsdsfGc]
2020-02-03 17:14:31  <--  [200] POST http://localhost:8000/stripe/webhook [evt_1G8adfsfsaOXJbjQ]
2020-02-03 17:14:31  <--  [200] POST http://localhost:8000/stripe/webhook [evt_1G8DasdfsdafsJCdrg3]
2020-02-03 17:14:31   --> invoice.payment_succeeded [evt_1G8DBasdffsdYxoFVe]
2020-02-03 17:14:32  <--  [200] POST http://localhost:8000/stripe/webhook [evt_1afdsfsuecRSxyyo]
2020-02-03 17:14:32  <--  [200] POST http://localhost:8000/stripe/webhook [evt_1G8DasdfsdsfsaHZVVJK]
2020-02-03 17:14:32  <--  [200] POST http://localhost:8000/stripe/webhook [evt_1G8DasdfsdV1YxoFVe]
Because we removed the previous subscription, this sets the whole chain of actions up to re-create on the Stripe side. Multiple actions are fired, but unfortunately since Stripe is now creating a NEW subscription, it’s unable to link with anything in our system. It’s simply not supported. That’s not ideal though since the customer was actually charged.
Adding Custom Methods
Let’s create our own controller to deal with this case.. even though it may be a bit of an edge case scenario and you most likely won’t be building out methods to deal with each webhook action Stripe sends over.
The default for methods that don’t exist in Cashier is a standard 200 response, but you can extend Cashier to suit your needs. Don’t go crazy on covering every action coming in from Stripe since most are not needed.
To start with a new controller, use the artisan command:
$ php artisan make:controller WebhookControllerNow create a new method in your controller, prefixed with ‘handle’ and using camel case based on the Stripe Action. For this example, that would be ‘handleCustomerSubscriptionCreated’.
app\Http\Controllers\WebhookController.php
<?php

namespace App\Http\Controllers;

use Illuminate\Http\Request;
use Illuminate\Support\Carbon;
use Laravel\Cashier\Subscription;
use Laravel\Cashier\Http\Controllers\WebhookController as CashierController;

class WebhookController extends CashierController
{
    /**
     * Handle subscription creation.
     *
     * @param  array  $payload
     * @return \Symfony\Component\HttpFoundation\Response
     */
    public function handleCustomerSubscriptionCreated($payload)
    {
        // Find the user
        if ( $user = $this->getUserByStripeId( $payload['data']['object']['customer'] ) ) {
            $data = $payload['data']['object'];
            // Find the user's subscription
            $user->subscriptions->first(function (Subscription $subscription) use ($data) {

                $plans = [
                    'plan_OPqrSTuVwxYZ' => 'swell',
                    'plan_AbCdEfGHIjkLMN' => 'amazing'
                ];
                $plan_name = isset( $plans[$data['plan']['id']] ) ? $plans[$data['plan']['id']] : false;

                if ( $plan_name ) {

                    // Update the previous fields that were on the canceled subscription
                    $subscription->name = $plan_name;
                    $subscription->stripe_id = $data['id'];
                    $subscription->stripe_plan = $data['plan']['id'];
                    $subscription->quantity = $data['quantity'];
                    $subscription->stripe_status = $data['status'];

                    // Trial ending date
                    if ( isset($data['trial_end'] ) ) {
                        $trial_ends = Carbon::createFromTimestamp( $data['trial_end'] );

                        if ( !$subscription->trial_ends_at || $subscription->trial_ends_at->ne( $trial_ends ) ) {
                            $subscription->trial_ends_at = $trial_ends;
                        }
                    }

                    // Cancellation date
                    if ( isset( $data['cancel_at_period_end'] ) ) {
                        if ( $data['cancel_at_period_end'] ) {
                            $subscription->ends_at = $subscription->onTrial()
                                ? $subscription->trial_ends_at
                                : Carbon::createFromTimestamp($data['current_period_end'] );
                        } else {
                            $subscription->ends_at = null;
                        }
                    }

                    $subscription->save();

                }
            });

        }
        return $this->successMethod();
    }
}
The above example borrows heavily from the built-in handleCustomerSubscriptionUpdated method, but in this case we’re searching for the previous customer’s subscription that was cancelled and updating it with the new information from Stripe. Stripe sends over a subscription object, which you can read more about here.
Now that the new controller has been created, we’ll need to tell Laravel that we’ll be using it for all of our webhooks. Open up the web routes file and add in the following:
routes\web.php
...

// Webhooks
Route::post('stripe/webhook', '\App\Http\Controllers\WebhookController@handleWebhook');
It’s important to note that your implementation might be a little more complicated than this, but for our current example, this will work fine and even allows for updating the plan we’re using from ‘swell’ to ‘amazing’ when re-creating the subscription. Also note that the array used here to store that plan information is just temporary until we store those in the database later.
To test this new controller, just log in to your Stripe Dashboard and find the customer’s profile where we failed to create a subscription the first time around. Remove the failed subscription (which will trigger the deleted action again) and add in a new subscription.
After you create the new subscription, you’ll see in your database that it’s updated all of the correct fields.

Wrapping Up
Now that we’ve successfully added in a custom method for handling one of the webhooks that’s not supported by Cashier out of the box, what else could they be used for? In the Laravel Cashier Documentation on the subject, they mention a method for invoices being paid (which would be the most obvious), but there are many others in the Stripe API Reference. Take a look through and discover which make the most sense for your projects.
Thanks for reading & stay tuned for future updates.
