
This article is a continuation of Creating a Laravel SaaS Framework .
In this section we’re going to work on creating a login and registration system to accommodate our multi-tenant application. To do this, we’ll set up a single registration form on the main domain and redirect to subdomains for users to sign in once they’ve registered for the site.
Logging in From the Top Level Domain
You could go into some complexity with OAuth tokens here, but let’s keep it simple for now with a separate field on the main domain’s login page, similar to what Slack (as an example) currently uses. The first step would be to enter your subdomain. If that subdomain exists it will take you there to continue the login. If it doesn’t exist, it brings you to a sign-up page.
New Routes for Logging In
If you’ve been following along, we don’t have a default login page right now, so the first thing we’ll need to do is add that in to our web.php route file.
routes\web.php
Route::domain('localhost')->group(function () {

    ...

    // Login Routes
    Route::get('login', 'Auth\LoginController@showDomainForm')->name('login.domain');
    Route::post('login', 'Auth\LoginController@routeToTenant');

    ...

});
Modify the Login Controller
And secondly, let’s create modify the Login Controller with the needed methods to redirect users over to the correct subdomain.
http\controllers\auth\LoginController.php
...
use Illuminate\Http\Request;
use Illuminate\Validation\Rule;
use Hyn\Tenancy\Models\Hostname;

class LoginController extends Controller
{
    ...

    public function showDomainForm() {
        return view('auth.domain');
    }

    public function routeToTenant( Request $request ) {
        $invalidSubdomains = config( 'app.invalid_subdomains' );
        $validatedData = $request->validate([
            'account' => [
                'required',
                'string',
                Rule::notIn( $invalidSubdomains ),
                'regex:/^[A-Za-z0-9](?:[A-Za-z0-9\-]{0,61}[A-Za-z0-9])$/'
            ],
        ]);

        $fqdn = $validatedData['account'] . '.' . config( 'app.url_base' );
        $hostExists = Hostname::where( 'fqdn', $fqdn )->exists();
        $port = $request->server('SERVER_PORT') == 8000 ? ':8000' : '';
        if ( $hostExists ) {
            return redirect( ( $request->secure() ? 'https://' : 'http://' ) . $fqdn . $port . '/login' );
        } else {
            return redirect('register')
            ->withInput();
        }
    }
In the methods above, the showDomainForm() function shows the new login form for the top level domain (we’ll get to that shortly), and once the form on that page is submitted, we’ll validate that the subdomain meets RFC 1035 standards and check whether the hostname already exits with the Hyn\Tenancy functions.
If the account DOES exits, the user is directed over to their own login page. If the account DOES NOT exist, they’ll be sent over to the registration page to create a new account.
Extra Configurations
You may have noticed, there’s a new configuration for the application that puts some restrictions on our subdomains as well. For instance, we don’t really want people registering things like “admin” or “www”… etc. It probably makes sense to filter out inappropriate terms here as well, but I’ll leave that up to you. To add that configuration, open up the app.php file and add in a new section.
config\app.php
    /*
    |--------------------------------------------------------------------------
    | Invalid Subdomains
    |--------------------------------------------------------------------------
    |
    | This list contains subdomains that are either unwanted or conflict
    | with a system value.
    |
    */

    'invalid_subdomains' => [
        'admin',
        'administrator',
        'api',
        'app',
        'controlpanel',
        'cp',
        'custom_domain',
        'custom_subdomain',
        'dns',
        'facebook',
        'hooks',
        'hostmaster',
        'linkedin',
        'mail',
        'microsoft',
        'node',
        'nodestatus',
        'ns',
        'pagestatus',
        'panel',
        'pinterest',
        'point',
        'pointdns',
        'root',
        'self',
        'service',
        'servicestatus',
        'sitestatus',
        'staging',
        'test',
        'twitter',
        'update',
        'updates',
        'webadmin',
        'webhooks',
        'webmail',
        'webmaster',
        'webnode',
        'webstatus',
        'worskpaces',
        'www',
        'www2'
    ],
After you’ve added that in, make sure to refresh your cache.
$ php artisan config:cacheFront End Changes
The new login blade will be a modified version of the original login form, so just copy over the original login.blade.php file from resources\views\auth and change it like the example below.
resources\views\auth\domain.blade.php
<div class="container">
    <div class="row justify-content-center">
        <div class="col-md-8">
            <div class="card">
                <div class="card-header">{{ __('Sign in to your account') }}</div>

                <div class="card-body">
                    <form method="POST" action="{{ route('login') }}">
                        @csrf

                        <div class="form-group">
                            <div class="row">
                                <label for="account" class="col-md-8 offset-md-2">{{ __('Enter Your') }} <strong>{{ __('Account URL') }}</strong></label>
                            </div>
                            <div class="row">
                                <div class="col-md-6 offset-md-2 text-md-right">
                                    <input id="account" type="text" class="form-control text-right inline @error('account') is-invalid @enderror" name="account" value="{{ old('account') }}" placeholder="your-url" required autofocus>
                                </div>
                                <div class="col-md-4 text-lg-left">
                                    <span class="sign-in-tld">.{{ config('app.url_base') }}</span>
                                </div>
                            </div>
                            <div class="row">
                                @error('account')
                                    <span class="invalid-feedback" role="alert">
                                        <strong>{{ $message }}</strong>
                                    </span>
                                @enderror
                            </div>
                        </div>

                        <div class="form-group row mb-0">
                            <div class="col-md-6 offset-md-2 text-md-center">
                                <button type="submit" class="btn btn-primary">
                                    {{ __('Continue') }} →
                                </button>
                            </div>
                        </div>
                    </form>
                </div>
            </div>
        </div>
    </div>
</div>
To go with this new template, we’ll add a couple basic styles, just for demo purposes. Add this in to your app.scss file after the default sections. Eventually the entire thing would need to be skinned to your particular application.. but I’m keeping this simple for now.
.sign-in-tld {
margin-left: -15px;
font-size: 1.5rem;
line-height: 1.5;
}
.form-control.is-invalid.text-right {
padding-left: calc(1.6em + 0.75rem);
padding-right: .75rem;
background-position: center left calc(0.4em + 0.1875rem);
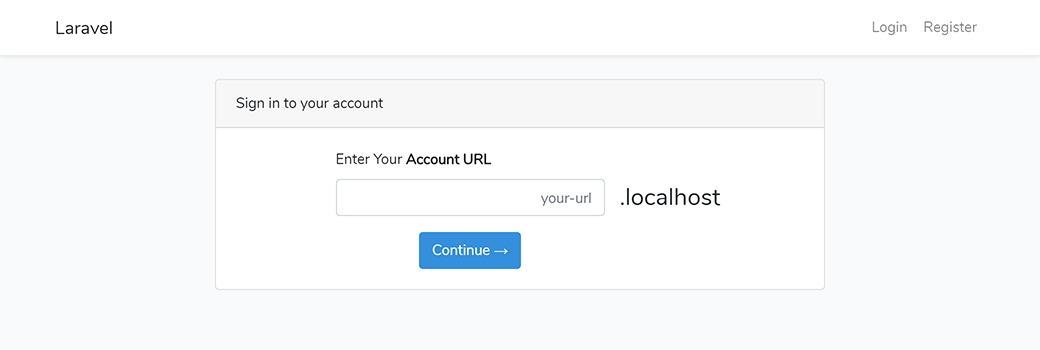
}Now when we visit http://localhost:8000/login there’s an initial screen to choose the account/subdomain.
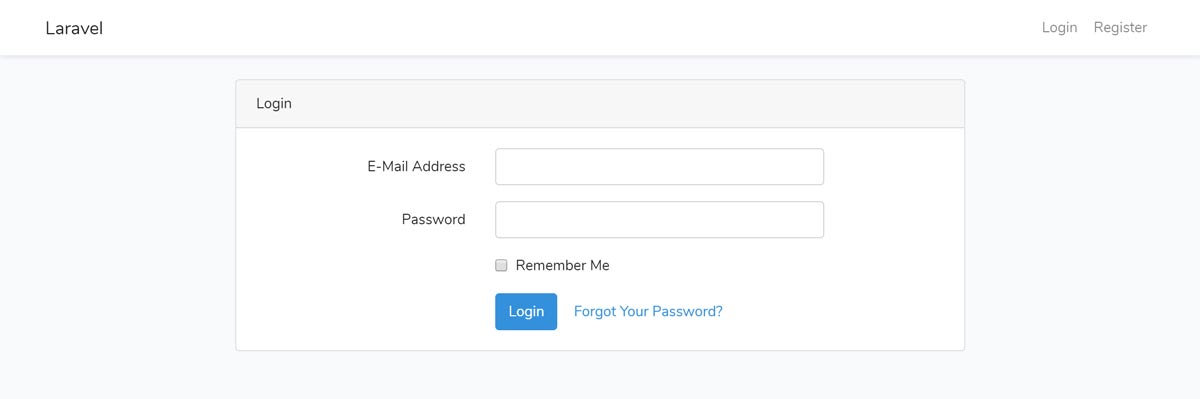
If you enter an account that already exits, you’ll be directed to the regular login page of that account.
If the account does not exist, the user should be redirected over to the register page so that they can create an account. Now that the logins are dealt with, that brings us to tenant registration.
Tenant Registration
It’s no good having an application if you can’t register users, right? So far we’ve added an artisan command, but that’s not ideal unless you really really really feel like doing that manually every time — and that doesn’t scale well now does it? Let’s begin by adding some registration routes.
Registration Routes
To add in the routes, go back to the web.php file and remove any of the old registration routes that we had within the tenancy middleware group. The new registration routes will need to be within the domain group instead so that they can only be accessed via the top level domain.
routes\web.php
Route::domain('localhost')->group(function () {

    ...

    // Registration Routes
    Route::get('register', 'Auth\RegisterController@showRegistrationForm')->name('register');
    Route::post('register', 'Auth\RegisterController@register');
These new routes use the default Register Controller, but we’re going to need to make some modifications so that it works with tenancy.
Modifying the Registration Controller
Creating a new user, we’re only concerned with a unique subdomain at this point. The default unique email doesn’t really apply here unless you want to have unique emails for your entire system… which now that I’m thinking about it may be a thing. For instance, if the user forgets their account name, you’d need to look them up by email address instead and have a master user table.. or associate an email with a hostname. For the purposes of this article, I’ll leave that to you.
We’re going to need our own register function in the controller in order to have access to the Request object. This is because we want to look up the hostname based on the fully qualified domain name, but we don’t want the user to have to type that whole thing in. They’ll simply type in “foo” for example and the FQDN will be created based on our APP_URL_BASE defined in the .env file. Here’s what the new register function would look like.
app\Http\Controllers\Auth\RegisterController.php
use Illuminate\Http\Request;
use Illuminate\Auth\Events\Registered;

    ...

    public function register(Request $request) {
        // we'll add in our fqdn here
        $data = $request->all();
        if ( isset( $data['account'] ) ) {
            $fqdn = $data['account'] . '.' . config('app.url_base');
            $request->merge(['fqdn'=>$fqdn]);
        }

        // validate with the validator below
        $this->validator($request->all())->validate();

        // new registered user event
        event(new Registered($user = $this->create($request->all())));

        $port = $request->server('SERVER_PORT') == 8000 ? ':8000' : '';
        return redirect( ( $request->secure() ? 'https://' : 'http://' ) . $fqdn . $port . '/login?success=1' );
    }
Note: Port is set here so that the redirect can be used on localhost. You won’t need this for production.
Now that the register method is set up and it merges the fqdn field with our data, we’ll validate and create a new tenant if the subdomain is available. Notice that we’re using the new invalid_subdomains configuration that we created for the login controller here as well.
app\Http\Controllers\Auth\RegisterController.php
use Illuminate\Validation\Rule;

    ...

    protected function validator(array $data)
    {
        $invalidSubdomains = config('app.invalid_subdomains');

        return Validator::make($data, [
            'account' => [
                'required',
                'string',
                Rule::notIn( $invalidSubdomains ),
                'regex:/^[A-Za-z0-9](?:[A-Za-z0-9\-]{0,61}[A-Za-z0-9])$/'
            ],
            'fqdn' => ['required', 'string', 'unique:hostnames'],
            'name' => ['required', 'string', 'max:255'],
            'email' => ['required', 'string', 'email', 'max:255'],
            'password' => ['required', 'string', 'min:8', 'confirmed'],
        ]);
    }
Assuming our validation is successful, the next step is to actually create the tenant, which we’ll do in the create() method. The createTenant() function is the same as the artisan command we created in a previous step.
app\Http\Controllers\Auth\RegisterController.php
use Hyn\Tenancy\Contracts\Repositories\HostnameRepository;
use Hyn\Tenancy\Contracts\Repositories\WebsiteRepository;
use Hyn\Tenancy\Environment;
use Hyn\Tenancy\Models\Hostname;
use Hyn\Tenancy\Models\Website;

    ...

    protected function create(array $data)
    {
        // Use the Tenancy package command to create the tenant
        $hostname = $this->createTenant( $data['fqdn'] );

        // swap the environment over to the hostname
        app( Environment::class )->hostname( $hostname );

        $user = User::create([
            'name' => $data['name'],
            'email' => $data['email'],
            'password' => Hash::make($data['password']),
        ]);
    }

    private function createTenant( $fqdn )
    {
        // first create the 'website'
        $website = new Website;
        app( WebsiteRepository::class )->create( $website );

        // now associate the 'website' with a hostname
        $hostname = new Hostname;
        $hostname->fqdn = $fqdn;
        app( HostnameRepository::class )->attach( $hostname, $website );

        return $hostname;
    }
After the tenant is created, they’re automatically directed over to their brand spankin new login page. Let’s also add on a parameter for success to show them their initial message.
return redirect( ( $request->secure() ? 'https://' : 'http://' ) . $fqdn . $port . '/login?success=1' );At this point, we will eventually have some notifications and welcome emails fire off as well, but we’ll get to that in another step. For now, let’s create the views for the registration and welcome pages.
Creating the Registration Views
On the register blade, we’ll create the new field to allow the user to choose an account name. Since we merged in the “fqdn” field, we’ll also have access to that for the error message. Make an addition for the “is-invalid” class and a new span in the validation message. Since we don’t want the user to see “fqdn” as the error name, we’ll just replace that text with “account” to keep it consistent. Also, make sure to remove the autofocus on the email field and place that on the account field since we want account first now.
resources\views\auth\register.blade.php
<div class="form-group row">
<label for="account" class="col-md-4 col-form-label text-md-right">{{ __('Account') }}</label>
<div class="col-md-4">
<input id="account" type="text" class="form-control text-right @error('account') is-invalid @enderror @error('fqdn') is-invalid @enderror" name="account" value="{{ old('account') }}" required autocomplete="account" autofocus>
@error('account')
<span class="invalid-feedback" role="alert">
<strong>{{ $message }}</strong>
</span>
@enderror
@error('fqdn')
<span class="invalid-feedback" role="alert">
<strong>{{ str_replace('fqdn','account',$message) }}</strong>
</span>
@enderror
</div>
<div class="col-md-4"><span class="sign-in-tld">.{{ config('app.url_base') }}</span></div>
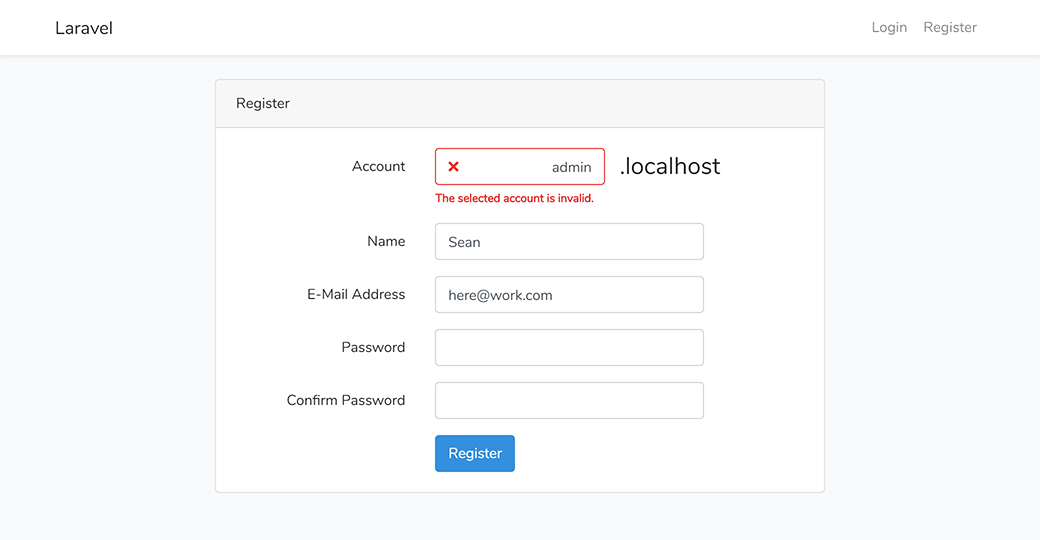
</div>This is what our new registration page should now look like.

If we enter in an invalid account name, it should kick back the error and display it for our new field.
Modifying the Login Blade
Now in the login blade, we’ll add in a message just under the .container div to display our new welcome message after the account is successfully created.
resources\views\auth\login.blade.php
    @if( app('request')->input('success') == 1 )
    <div class="row justify-content-center">
        <div class="col-md-8">
            <div class="alert alert-success" role="alert">
            Account created successfully. You may log in below with the credentials you provided.
            </div>
        </div>
    </div>
    @endif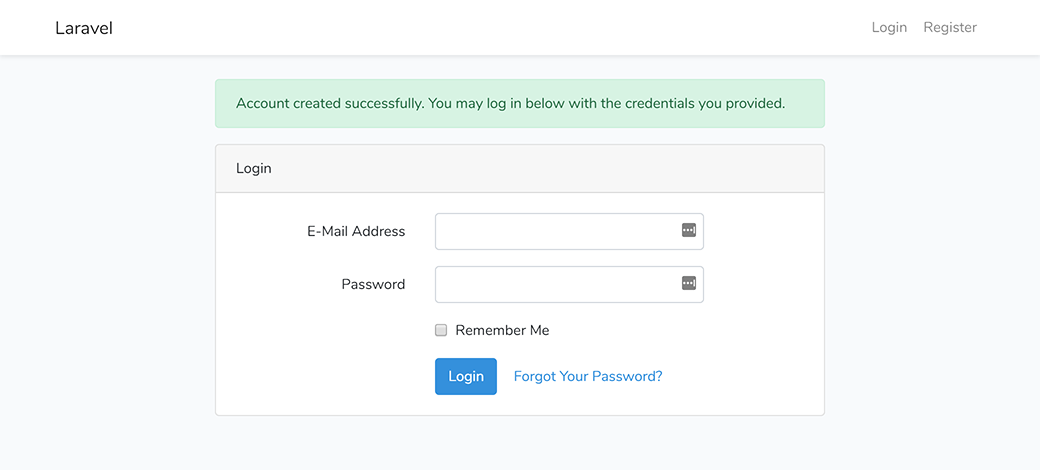
Modifying the Welcome Blade
Lastly, let’s modify our welcome blade so that tenants have a different page than the main application. For now, just copy over the original welcome blade to a new tenant-welcome.blade.php file.
resources\views\tenant-welcome.blade.php
...

      <body>
        <div class="flex-center position-ref full-height">
            @if (Route::has('login'))
                <div class="top-right links">
                    @auth
                        <a href="{{ url('/home') }}">Home</a>
                    @else
                        <a href="{{ route('login') }}">Login</a>
                    @endauth
                </div>
            @endif

            <div class="content">
                <div class="title m-b-md">
                    {{ config('app.name') }}
                </div>
            </div>
        </div>
    </body>

...
And back in our web.php file, add in the tenant specific welcome to the middleware group.
routes\web.php
...

Route::middleware('tenant.exists')->group(function () {
    // Not Logged In
    Route::get('/', function () {
        return view('tenant-welcome');
    });

    ...
This gives us a nice clean page with only a login link.

Wrap Up
The new user registration flow should now be worked out as far as registering from the main application page, but we’ll still need some ability to add additional users and roles for the tenants as well as email notifications, password resets and all that fun jazz. Once that’s all set, it’s probably important to hook up payments of some sort! Laravel has a nice Cashier add-on that integrates with Stripe, so I’ll be going through the setup of that in a future article.
Thanks for reading, and stay tuned for the next write-up.
